Ghostscale Business Card SubGHz Expansion Board
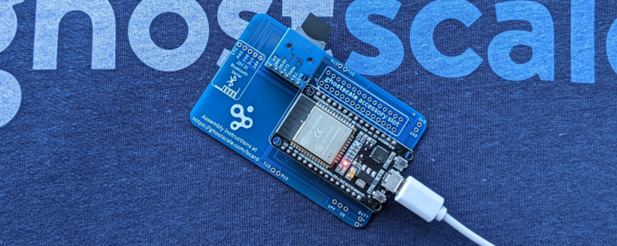
The Ghostscale business card is a customized printed circuit board (PCB) that is designed to be an expandable platform for security testing, experimenting, and learning about embedded systems and wireless protocols.
Our card has additional project capabilities, too! Come visit us at another event to learn more!
What can it do?
Our 2024 expansion board adds a CC1101 SubGHz radio that can be used to perform attacks and testing in the 300-433 MHz range. Common examples include cloning auto key fobs or garage door openers, or performing the well-known Tesla charge door attack.
Instructions for Use
- Plug the expansion board into the slot on the business card with the CC1101 module side facing forward (be sure the CC1101 module is in slot “A” )
- Plug the ESP32 module into your laptop using a USB cable
- Determine the COM port the ESP32 module is using
- On Windows, open a command prompt and type
mode- You may need to install a CH340 USB adapter driver on Windows if the device is not showing up
- On Linux, run
sudo dmesgand look for the/dev/ttyXXXXport of the new device
- On Windows, open a command prompt and type
- Connect to the ESP32 module using a serial COM port tool (e.g., Putty, screen, Arduino IDE) at 38400 baud to send serial commands to the ESP32 module
- Type
helpfor a list of cc1101-tool commands available- See the cc1101-tool GitHub page for a command reference
- The Ghostscale firmware includes four additional commands:
saveflashandloadflash, which allow you to store and playback raw recordings on the ESP32 SPIFFS flash filesystem
Firmware
If you build the SubGHz expansion board with us at a conference or event, you will program it with the cc1101-tool firmware (read more about cc1101-tool).
If you want to (re)install the firmware:
- Download the latest Ghostscale CC1101 SubGHz expansion board firmware
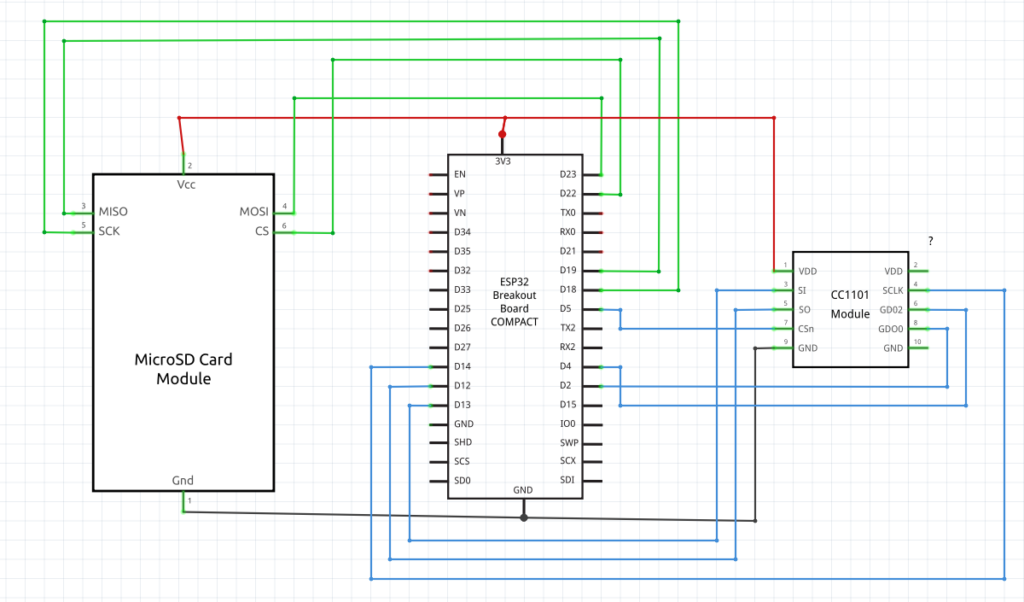
Circuit Diagram
Here is the circuit diagram for the SubGHz expansion board running cc1101-tool installed on a Ghostscale bcard v1.1:
Bill of Materials
Parts required to run cc1101-tool:
| Part | Quantity | Notes |
|---|---|---|
| Your (prior built) Ghostscale bcard | 1 | |
| 30-pin slot card connector | 1 | 2.54mm pitch (if not already mounted) |
| Ghostscale SubGHz expansion PCB | 1 | |
| CC1101 module with antenna | 1 | |
| 2X4-pin female header | 1 | 2.54mm pitch |
Evil Crow RF V2 Upgrade
Evil Crow RF V2 is a radiofrequency hacking device for pen test and Red Team operations. It uses two CC1101 radios and an ESP32 microcontroller. By adding a second CC1101 module and a couple of jumper wires, you can further expand your SubGHz expansion board to be able to run Evil Crow RF V2 (read more about the original EvilCrow RF V2 project).
Instructions to Build and Use
At a minimum, to use the Evil Crow RF V2 firmware, you’ll need to:
- Add a second CC1101 module to slot “B” on the Ghostscale SubGHz expansion PCB
- Populate R1 and R2 each with a 100k Ohm or smaller resistor (or just a wire)
This will “pull up” the two unused pushbuttons. You can fully control this minimal build through the Evil Crow RF V2 web interface.
For a full Evil Crow RF V2 build, which will let you send attacks using the pushbuttons as well as the web interface, you can:
- Populate R1 and R2 with 10k Ohm to 100k Ohm resistors
- Populate R3 with an ~100 Ohm resistor
- Add pushbuttons and an LED
Firmware
In order to run Evil Crow RF, you will need to reflash your firmware:
- Follow the h-RAT Evil Crow RF custom firmware installation instructions to download the firmware and SD Card files
NOTE: The h-RAT firmware is a closed source alternative to the Evil Crow RF default firmware and includes support for Flipper Zero .sub files as well as other fun features. Luckily we designed and built the Ghostscale bcard v1.1 to use the h-RAT Evil Crow RF firmware out of the box!
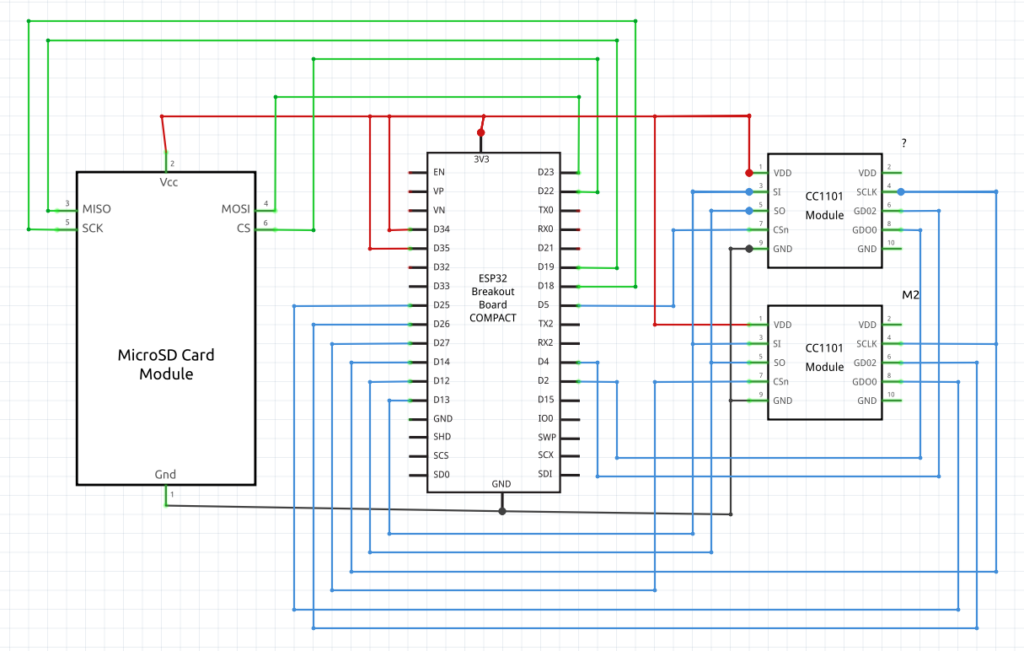
Circuit Diagram
Here is the circuit diagram for the SubGHz expansion board running Evil Crow RF V2 installed on a Ghostscale bcard v1.1:
Bill of Materials
Minimal parts required to run Evil Crow RF V2:
| Part | Quantity | Notes |
|---|---|---|
| Your (prior built) Ghostscale bcard | 1 | |
| 30-pin slot card connector | 1 | 2.54mm pitch (if not already mounted) |
| Ghostscale SubGHz expansion PCB | 1 | |
| CC1101 module with antenna | 2 | |
| 2X4-pin female header | 2 | 2.54mm pitch |
| Pull down resistor (or jumper wire) | 2 | For R1 and R2 |
Optional components:
| Part | Quantity | Notes |
|---|---|---|
| LED | 1 | |
| LED current limiting resistor | 1 | |
| Pull down resistor | 2 | For R1 and R2 |
| Pushbutton | 2 | For R3 |
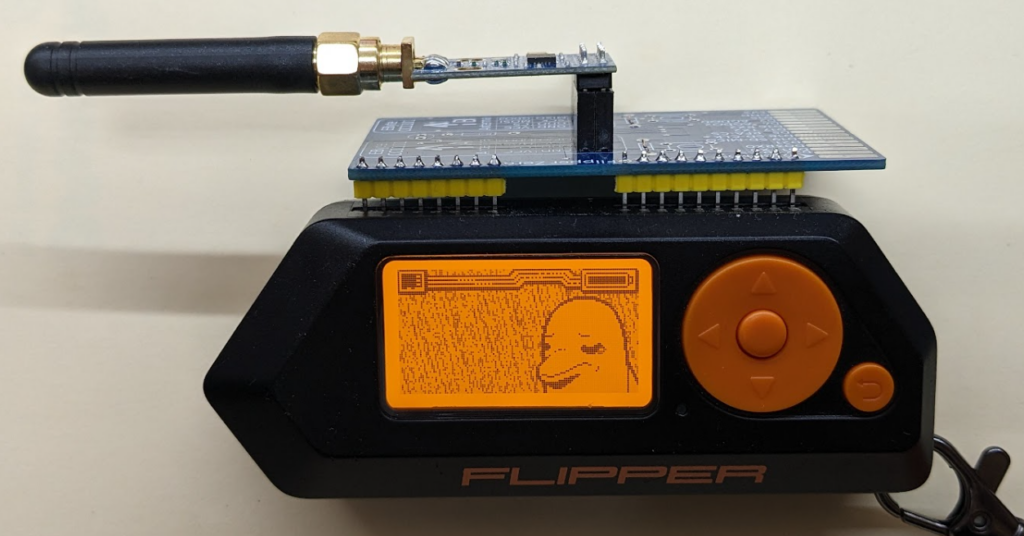
Flipper Zero Mode
Your Ghostscale SubGHz expansion board can also be used as a Flipper Zero external SubGHZ radio – no firmware needed!
- Add male header pins to the Flipper Zero expansion port on the side of the Ghostscale SubGHz expansion PCB
- Place the CC1101 module into position “A”
- Plug the board into your Flipper Zero
Prior Business Card Versions
cc1101-tool and Evil Crow RF V2 are not compatible with version 1.0 bcards. If you have a version 1.0 bcard, you can easily convert it to a version 1.1 bcard by (a) cutting the trace connecting the SD card module CS pin to pin 4 of the ESP32 and (b) connecting a “bodge wire” between the SD card module CS pin and pin 22 of the ESP32.
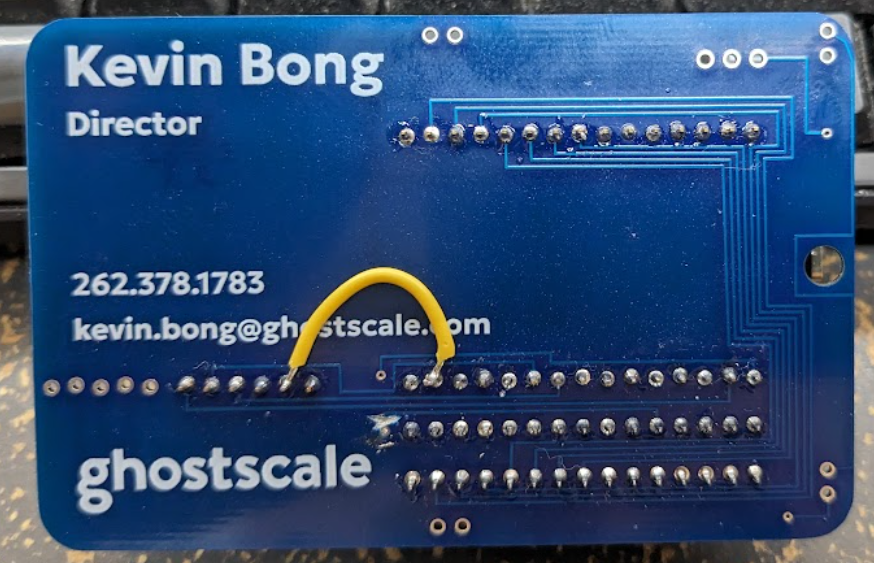
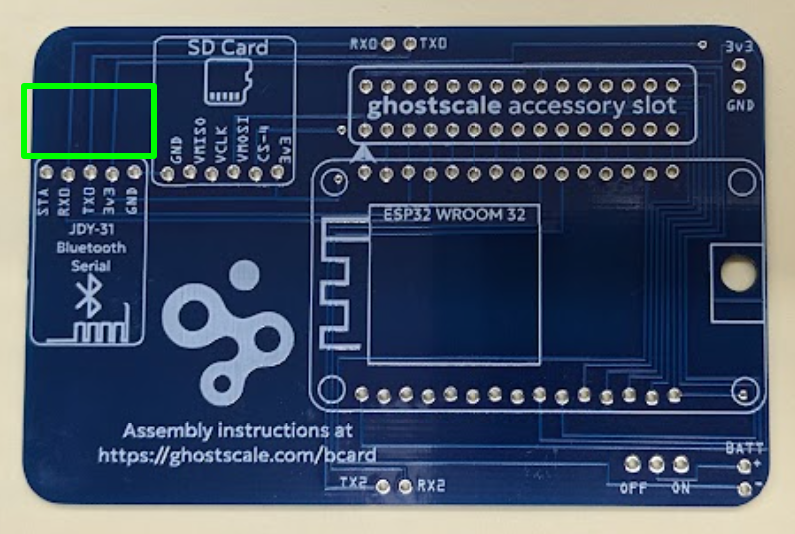
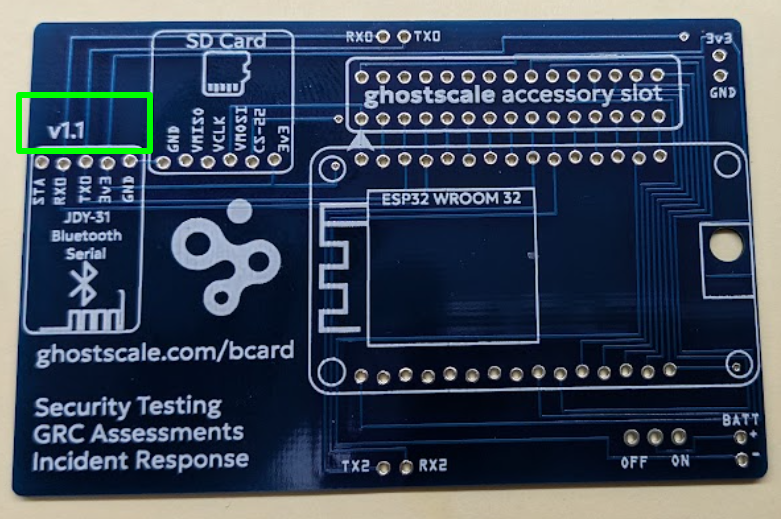
How Do I Know Which Version I Have?
The version is written above the Bluetooth expansion slot (v1.0 does not have any writing).
Please Use Ethically
The Ghostscale business card is intended for research and authorized testing purposes. Users are responsible for ensuring compliance with all relevant laws and regulations.